
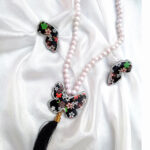
 Outfit Matching Jewelry
 Earring Studs
 Earrings
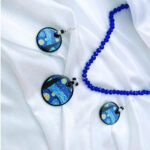 Jewelry Set
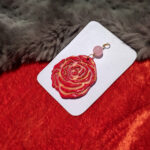 Pendant

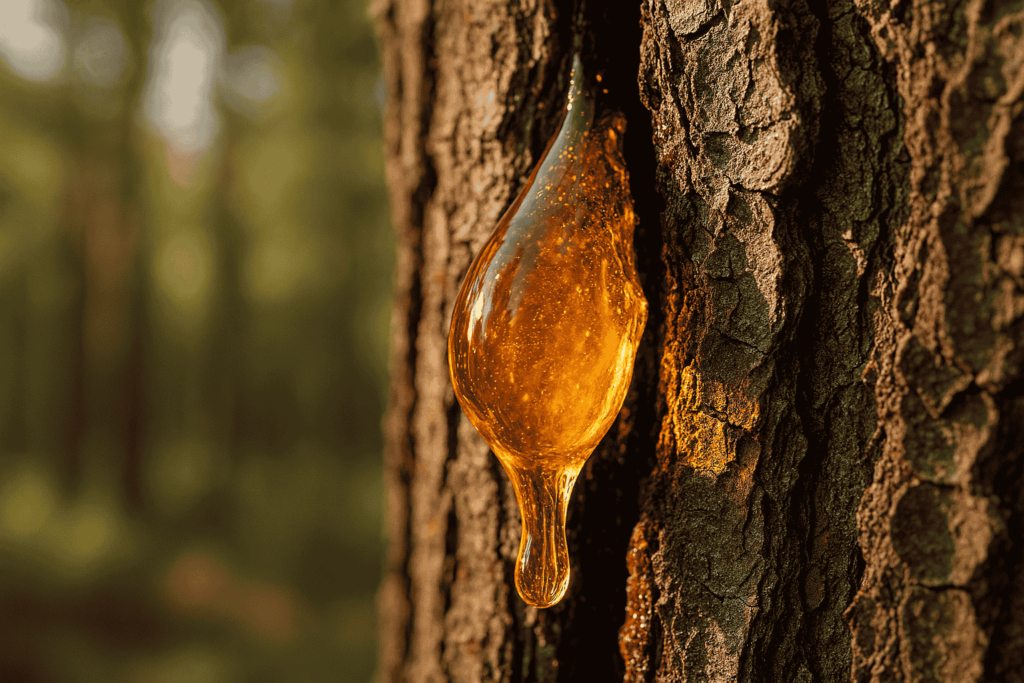
You’ve probably seen those glossy, glass-like pendants on Instagram and thought, “Can I actually make this at home?”
Short answer: yes, you can. Resin art for beginners is easier than it looks — and it is one of the most rewarding creative skills you can learn at home.
Quick Answer
Resin art for beginners is a craft where you combine epoxy resin with a hardener. You can add colors or decorative elements to it, then pour it into molds to create items like jewelry or other beautiful pieces. If you are just starting out, you can do it at home with basic resin jewelry supplies. You will also need silicone molds, and you have to mix the resin correctly so you do not get bubbles or problems while it is curing.
At TrendyHac, we are passionate about handmade craft. Learn more about our handmade story.
What Is Resin Art?
Before we get into supplies and steps, I want to answer a question I get asked a lot: what is resin art?
Resin art is a craft where you mix resin with a hardener and shape it into solid, shiny pieces. When you combine the two parts, the mixture slowly hardens into a glossy finish that you can color, layer, or fill with small objects. Most beginners start with epoxy resin art because it’s easy to work with and gives you time to shape your piece before it sets.
Some people think resin art is only about making jewelry, but it’s more than that. You can use the same process to make coasters, plaques, trays, bookmarks, and even wall pieces. Jewelry is just a good place to start because it’s simple and quick.
What makes resin art with epoxy so popular is the freedom it gives you. You can add dried flowers, mix in some powder, or seal a small photo inside a pendant, and each piece turns out a little different. Once you understand how resin behaves, you’ll keep coming up with new ideas — and that’s exactly what makes this craft so much fun.
What Is Resin Jewelry and Why Is Everyone Making It?
Resin jewelry, in particular, has exploded in popularity — and it’s the easiest entry point into the craft.
The rise of DIY resin jewelry (why it’s trending)
When everyone was staying at home, many people started making things themselves, and this quickly became very popular. During this period, interest in handmade jewelry grew significantly, with many craft platforms reporting a noticeable spike in searches for resin and jewelry-making kits. Resin became a big part of this trend because it is easy for beginners to use, yet the final pieces often look professionally made. People were drawn to resin art not only because it is simple to start, but also because it allows them to create beautiful, high-quality items at home.
What makes resin jewelry unique compared to other DIY crafts
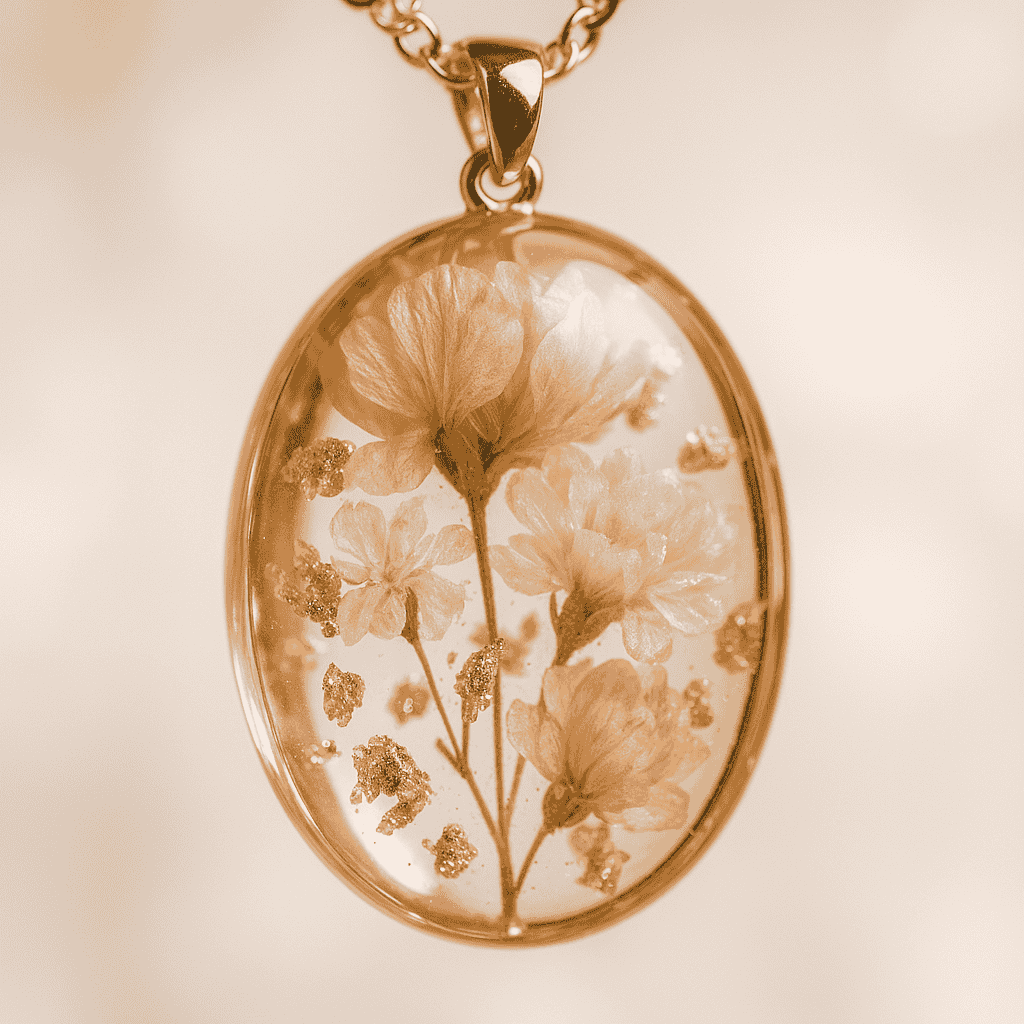
Unlike clay or beadwork, resin gives you a transparent vs opaque finish that mimics glass without needing a kiln. You can embed objects in resin, such as dried flowers, gold foil, or even photos.
That level of customization? Hard to beat.
Can a complete beginner make resin jewelry at home?
Yes, it is possible. But here’s something most guides do not tell you: your first few pieces of resin jewelry will probably not turn out perfect. You might see bubbles, uneven curing, or even a slightly sticky surface.
That’s completely normal. It’s part of learning how to work with resin and understanding how the mixture behaves.
Making resin jewelry at home takes a bit of practice, especially when it comes to the resin curing process. Getting the mixing ratios right is one of the most important steps for good results.
Now that you understand this, let’s look at the tools you actually need to get started.
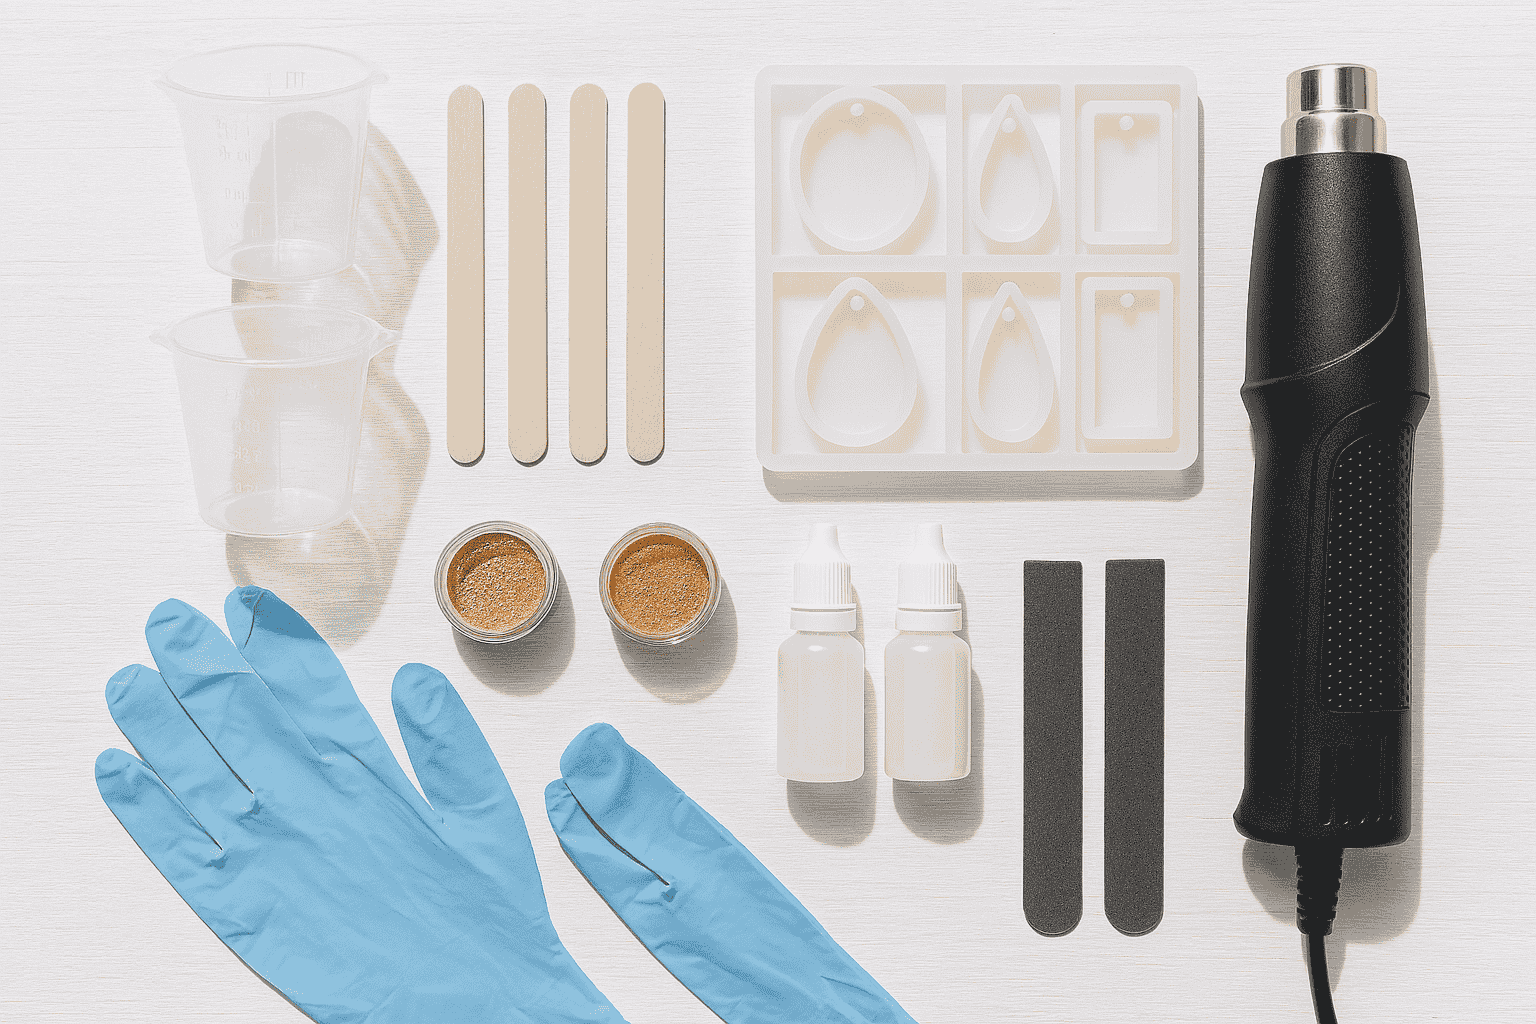
Resin Art for Beginners: Complete Supplies List
Before you buy random kits, understand what matters.
Choosing the right resin type: epoxy vs. UV resin vs. polyester resin
| Resin Type | Best For | Cure Time | Difficulty |
| Epoxy resin | Beginners,Large molds | 24 to 48 hours | Easy |
| UV resin | Small jewelry, fast projects | Minutes under UV light | Medium |
| Polyester resin | Industrial use | Fast | Advanced |
Best resin for art projects (for beginners): epoxy resin. It’s forgiving and easier to control.
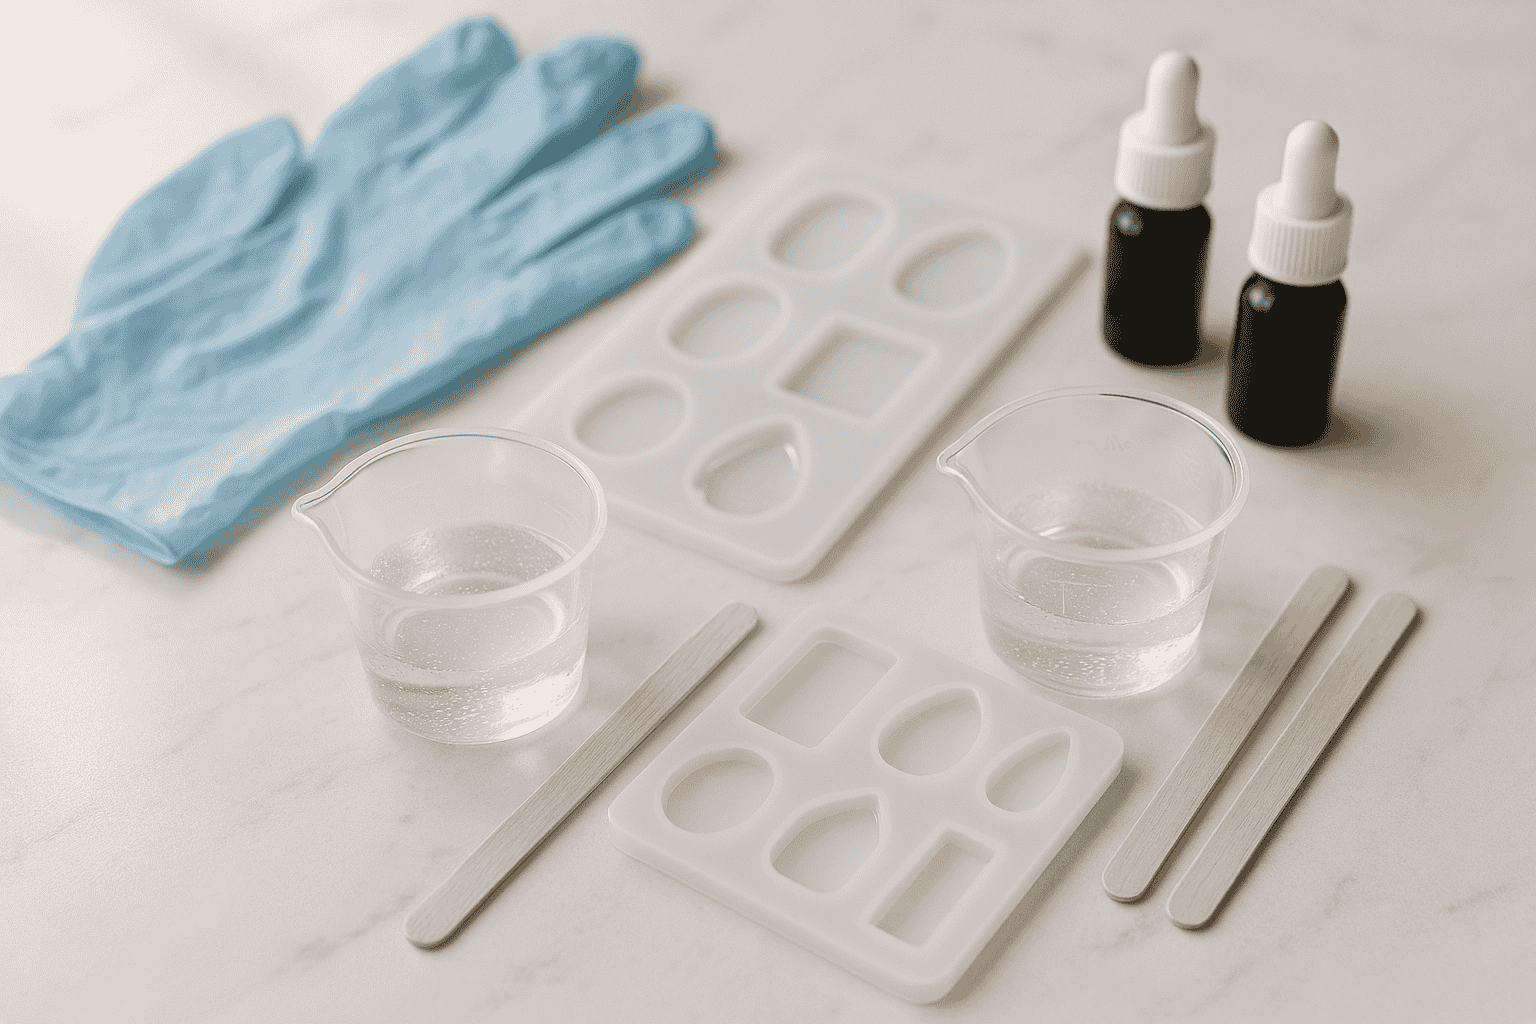
Essential tools every beginner needs
Start simple. You don’t need a full studio.
- Mixing cup with measurement markings
- Stirring sticks for proper blending
- Silicone molds or jewelry molds
- Protective gloves and safety mask
- Dropper bottles for precise pouring
Optional but helpful supplies for better results
Once you improve, these change everything:
- Heat gun or torch lighter for bubble removal techniques
- Mica powder and alcohol inks for colorant dispersion
- Glitter additives for creative finishes
- Sanding paper and polishing compound
Where to buy resin jewelry supplies
If you want to explore ready-made handmade resin jewelry, check out the Resin & Clay Jewelry Collection at TrendyHac.
Local craft stores are fine, but online platforms usually offer better variety. Amazon and specialized resin suppliers provide better resin kits.
Estimated cost to get started
Budget setup: around 3000 to 6000 PKR
Premium setup: 12000+ PKR
In my experience, beginners waste money by buying too many pigments early. Start small.
Next, let’s talk about safety, because resin isn’t completely harmless.
Safety First: What You Must Know Before Working with Resin
This is where many beginners make serious mistakes.
Is resin toxic?
Liquid resin releases fumes during curing. Direct skin contact can irritate.
The risk isn’t extreme, but long exposure without protection can lead to allergies.
Must have safety gear
- Protective gloves
- Safety mask or respirator
- Eye protection
Best workspace setup
Always work in a ventilated workspace. Near a window or fan is ideal.
Disposal tips
Never pour leftover resin down the sink. Let it harden first, then discard. Safety sorted. Now comes the most exciting part of resin art — actually making your first piece.
How to Make Resin Jewelry: Step by Step for Beginners
This is where resin art for beginners truly comes to life.
Step 1: Choose your mold
Use silicone molds or pendant molds. They are flexible and make the demolding process much easier.
Step 2: Prepare your workspace
Lay out tools on a casting tray. Keep everything within reach.
Step 3: Measure and mix resin correctly
This is critical.
Most epoxy resin uses a 1:1 ratio. Even a 5 percent mistake can ruin curing.
Mix slowly for 2 to 3 minutes to avoid air bubble formation.
Step 4: Add color and inclusions
Use resin dyes, mica powder, or alcohol inks. Add slowly to control pigment blending.
Want something special? Try embedding dried flowers.
Step 5: Pour the resin
Pour slowly from one side. This reduces air bubble trapping.
Use a heat gun briefly for air bubble prevention.
Step 6: Cure the resin
Epoxy resin needs 24 hours. UV resin cures in minutes under UV light.
Step 7: Demold your piece
Gently remove from the mold once hardened.
Step 8: Sand and polish
Use sanding paper from 400 to 2000 grit. Then apply a polishing compound.
Step 9: Add jewelry hardware
Attach jump rings, jewelry hooks, or chains to complete your piece.
Your first resin jewelry piece is now ready to wear or gift.
Once you are comfortable with basic molds, custom silicone molds open up a whole new level of creative possibilities.
How to Make DIY Silicone Molds for Resin Jewelry
At some point, you’ll want unique designs.
When should you make your own mold?
When you want custom shapes or branding.
Materials needed
- Silicone mold material
- Master object
- Mold release spray
Step-by-step process
Pour silicone over your object. Let it cure. Remove the original piece.
Pro tip
Always use mold release techniques to avoid sticking and damage.
Now your designs become truly original.
Resin Jewelry Design Ideas and Techniques to Try
Creativity is where resin art shines.
Floral and botanical designs
Embed flowers or leaves for a natural look.
Galaxy and geode effects
Use layered resin pours and color blending.
Layering techniques
Pour in stages to create depth and dimension.
Embedding personal items
To preserve your special moments beautifully, explore the handcrafted Resin Coaster & Plaque Collection at TrendyHac.
Photos, text, or keepsakes work beautifully.
Glow and metallic styles
Use glow powders or metallic pigments.
Here’s what most guides miss:
Combining layering techniques with transparent and opaque finishes creates premium-looking pieces that sell better.
Now let’s fix the mistakes you will probably make.
Common Resin Jewelry Mistakes and How to Fix Them
Making mistakes is part of the process.
Sticky resin after curing
Cause: incorrect mixing ratios
Fix: measure precisely and remix properly
Bubbles in finished pieces
Cause: fast mixing or thick pouring
Fix: use a heat gun and slow resin pouring techniques
Cloudy or yellow resin
Cause: poor quality resin or UV exposure
Fix: use UV-resistant resin
Warping and shrinkage
Cause: uneven curing time control
Fix: maintain a stable temperature
Mold sticking issues
Cause: no mold release
Fix: apply release spray before pouring
Next, we refine your finish.
Finishing and Polishing Resin Jewelry Like a Pro
This step separates beginners from sellers — and it is what makes your resin art pieces look store-bought rather than handmade.
Wet sanding technique
Start from 400 grit and move upward.
Polishing for clarity
Use a polishing compound for a glossy surface finish.
Sealing for durability
Apply sealing spray to protect the surface.
UV-resistant coating
Adds heat resistance properties and longevity.
Buyers consistently pay more for pieces with a clean, glossy finish compared to unpolished ones.
Now let’s compare resin types clearly.
Epoxy Resin vs. UV Resin for Jewelry: Which Should You Use?
When to choose epoxy resin
Best for beginners and larger designs.
When UV resin is better
Perfect for small, quick projects.
Can you combine both?
Yes. Many creators use epoxy for base layers and UV resin for top coating.
Smart combination gives better control and faster workflow.
Turning Your Resin Jewelry Hobby Into a Business
Here’s where things get interesting.
Cost per piece
Usually between 100 to 300 PKR depending on materials.
Pricing strategy
Sell between 500 to 1500 PKR depending on design and finish.
Best-selling platforms
For real pricing and presentation inspiration, browse the Customized Gift Store at TrendyHac.
Etsy, Instagram, and local markets work best.
Branding tips
Good packaging increases perceived value instantly.
People don’t just buy jewelry. They buy presentations.
Looking for gift presentation ideas? Read our guide on Customized Gifts for Her in Pakistan to see how thoughtful packaging and presentation can make any handmade piece feel truly special.
Resin Art in Karachi and Across Pakistan
Resin art has gained real momentum in Pakistan over the past couple of years. If you have been searching for resin art in Karachi, Lahore, Faisalabad, or any other city, you will notice that basic supplies are far easier to find than they used to be. Local craft shops and online sellers now stock epoxy, silicone moulds, pigments, and beginner kits, and many of them deliver nationwide.
Karachi in particular has a growing community of resin artists, with small home studios and weekend craft markets where you can see finished work up close before trying it yourself. It is a genuinely helpful way to learn what is realistic for a first attempt.
That said, not everyone has the time, space, or patience to mix resin at home, and that is perfectly okay. If you would rather skip the setup and simply own a beautiful, ready-made piece, we design and ship handmade resin jewellery, coasters, and personalised gifts across Pakistan. You can browse the full range in our Resin & Clay Jewellery collection, or message us on WhatsApp for a custom order.
Frequently Asked Questions About Resin Art
Is resin art safe for beginners?
Yes, as long as you use protective gear and proper ventilation.
How long does resin take to cure?
Epoxy resin takes 24 to 48 hours. UV resin cures in minutes.
Why does my resin have bubbles?
Usually due to fast mixing or improper pouring.
Can I do resin art at home?
Yes, even a small ventilated space works.
What is the best resin for beginners?
Epoxy resin is the easiest to start with.
Final Thoughts
Resin art for beginners looks complicated at first — but it really isn’t.
Once you understand mixing ratios, curing behavior, and surface finishing, everything starts to click.
Start simple. Focus on clean results. Then experiment with layering, embedding, and advanced designs.
If you’re serious, your next step is clear:
Pick a basic resin kit and create your first 3 pieces this week.
━━━━━━━━━━━━━━━━━━━━━━━━━━━━━━━━━━━━━━━━
ABOUT THE AUTHOR

Bakhtawar Javaid
Textile Designer | Gold Medalist | Owner of TrendyHac
Resin Artist & DIY Jewelry Maker — Faisalabad, Pakistan
Bakhtawar has been creating handmade resin jewelry for over 3 years, completing more than 150 pieces ranging from simple pendants to custom bridal accessories.
She started resin art as a home hobby during 2022 and later turned it into a small business, selling pieces through Instagram and local craft markets in Faisalabad.
Her first resin piece had so many bubbles she almost quit — but 3 months of practice later, she developed a clean, repeatable process that now produces professional results every time.
Everything on this site comes from real hands-on experience — not theory.
Instagram: @bakht_rana22
Website: TrendyHac.com